


Table of Contents Hide
- The Short Version
- Click Start
- Mouse-over the gear icon
- Click Settings
- Click Update & Security
- Click the Windows Security tab
- Click Open Windows Security
- Click Virus & threat protection
- Click Manage settings under Virus & threat protection settings
- Turn off the Real-time protection button
- Click Yes
- Troubleshooting
- You might like…
If you’re using Windows’ built-in Microsoft Defender antivirus, you might have to temporarily disable it to complete the installation of some software. Here’s our guide to turning it off in Windows 10.
Never disable your real-time malware protection unless you actually have to. Some software does, however, require this in order to complete installation because they need to access files, registry entries or directories that Defender usually protects.
Programs that may not install correctly if your real-time antivirus is active will inform you of this, do you don’t need to disable your AV every time you install anything!

Kaspersky Anti-Virus
Essential Virus Protection
Our 5-star rated anti-virus blocks malware and viruses in real time and stops hackers, now 50% off at just £12.49
- Kaspersky
- Was £24.99
- £12.49 per year
The Short Version
- Click Start
- Mouse-over the gear icon
- Click Settings
- Scroll down
- Click Update & Security
- Click the Windows Security tab
- Click Open Windows Security
- Click Virus & threat protection
- Click Manage settings under Virus & threat protection settings
- Turn off the Real-time protection button
- Click Yes
-
Step
1Click Start

Click the Windows Start button. We’re going to navigate to Microsoft Defender’s settings through the menus, but you can search for “Windows Security” to get there.
-
Step
2Mouse-over the gear icon
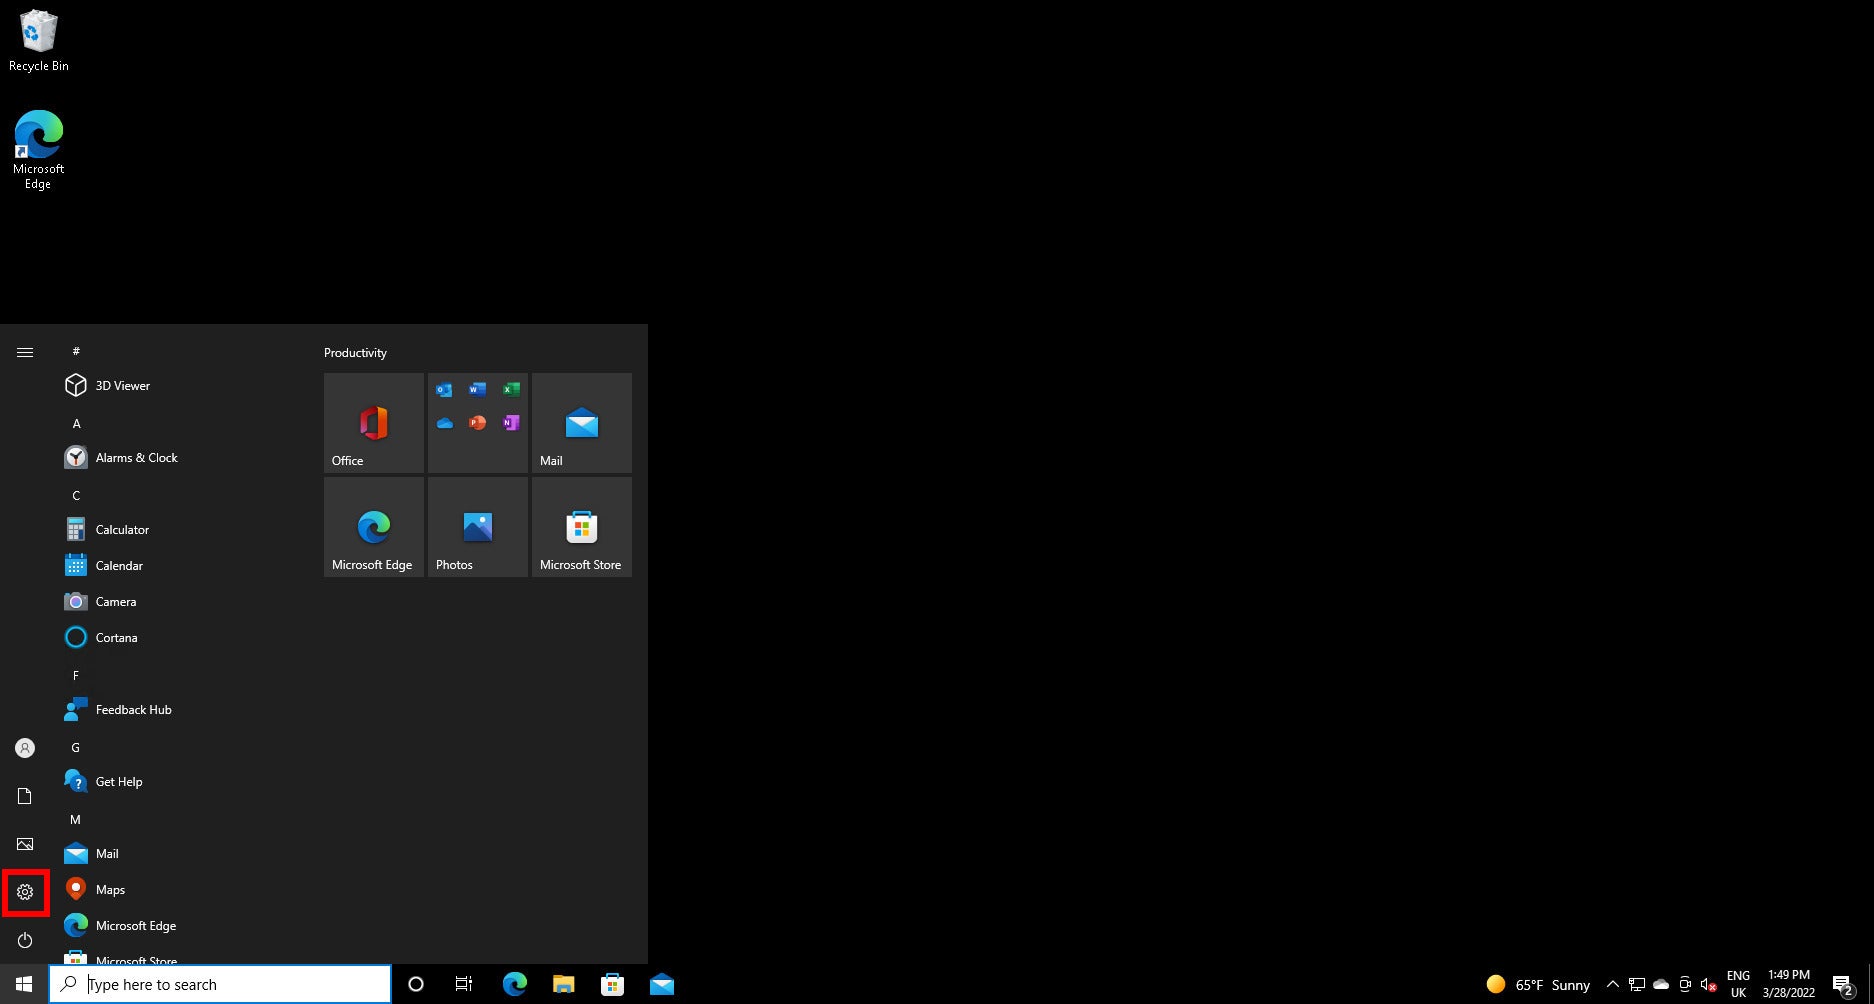
When you hover the mouse over the gear icon, it’ll expand its Settings tag.
-
Step
3Click Settings
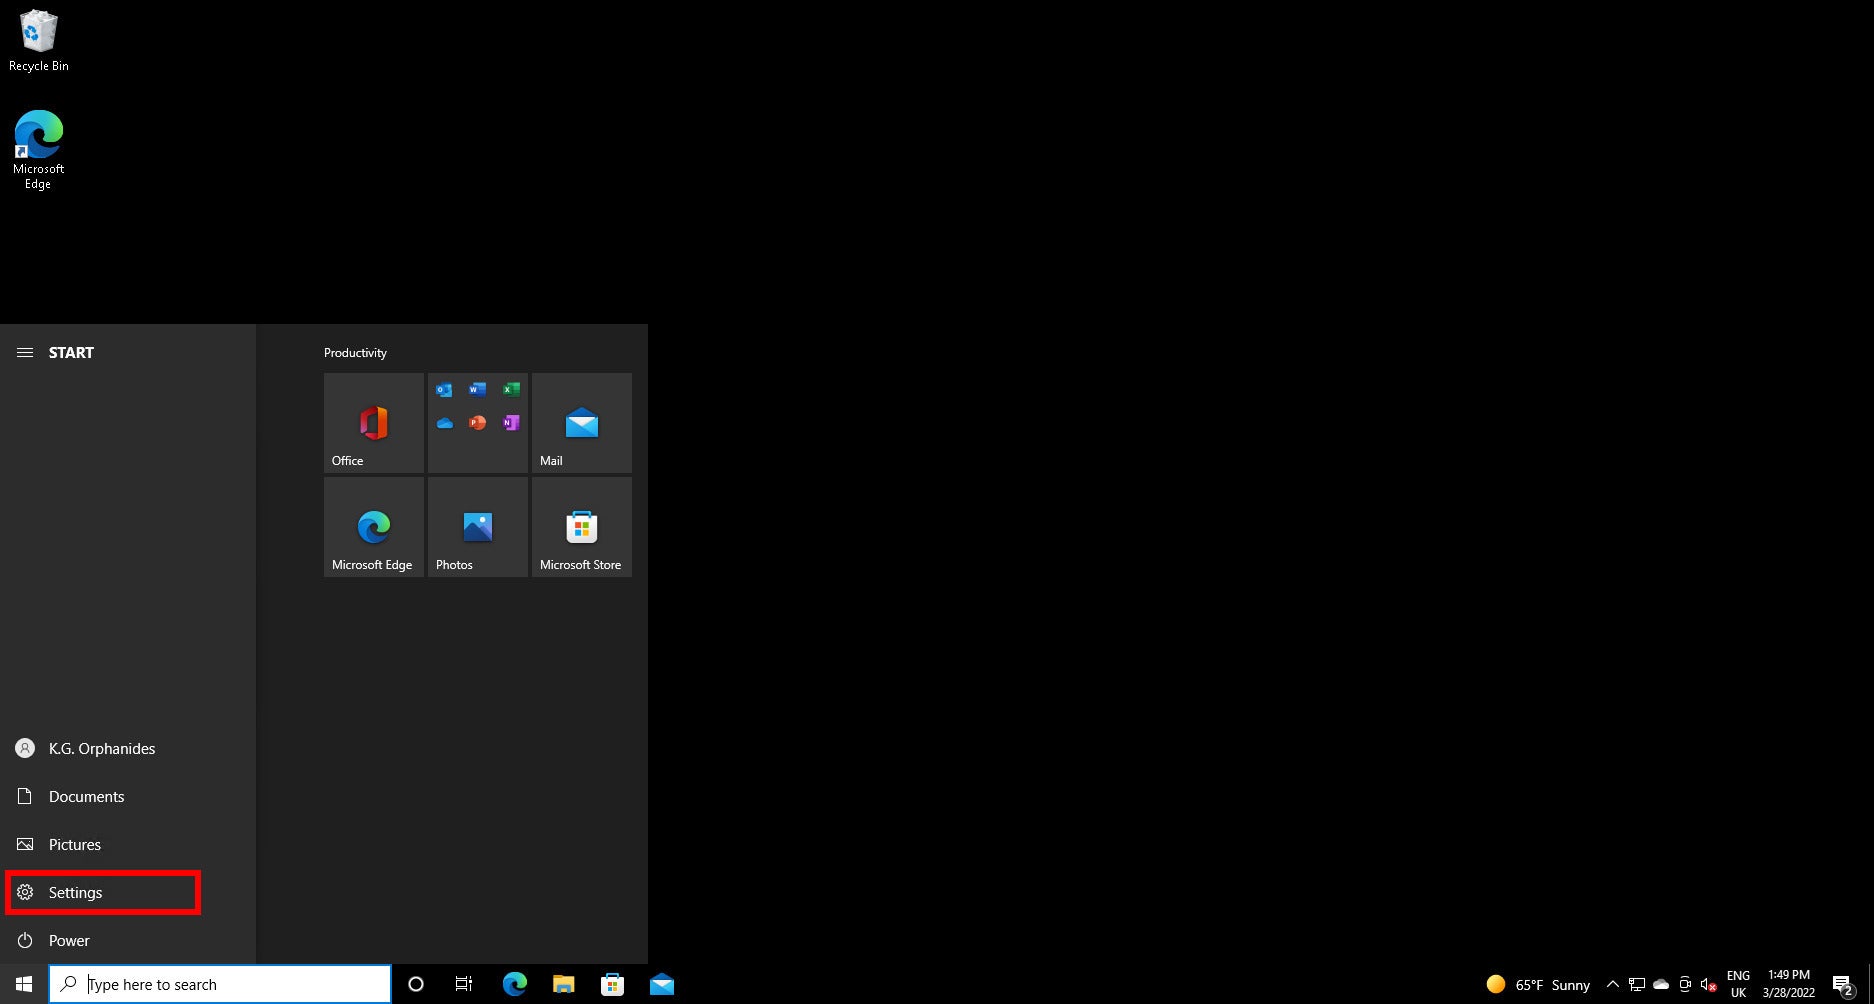
Click on the Settings button.
-
Step
4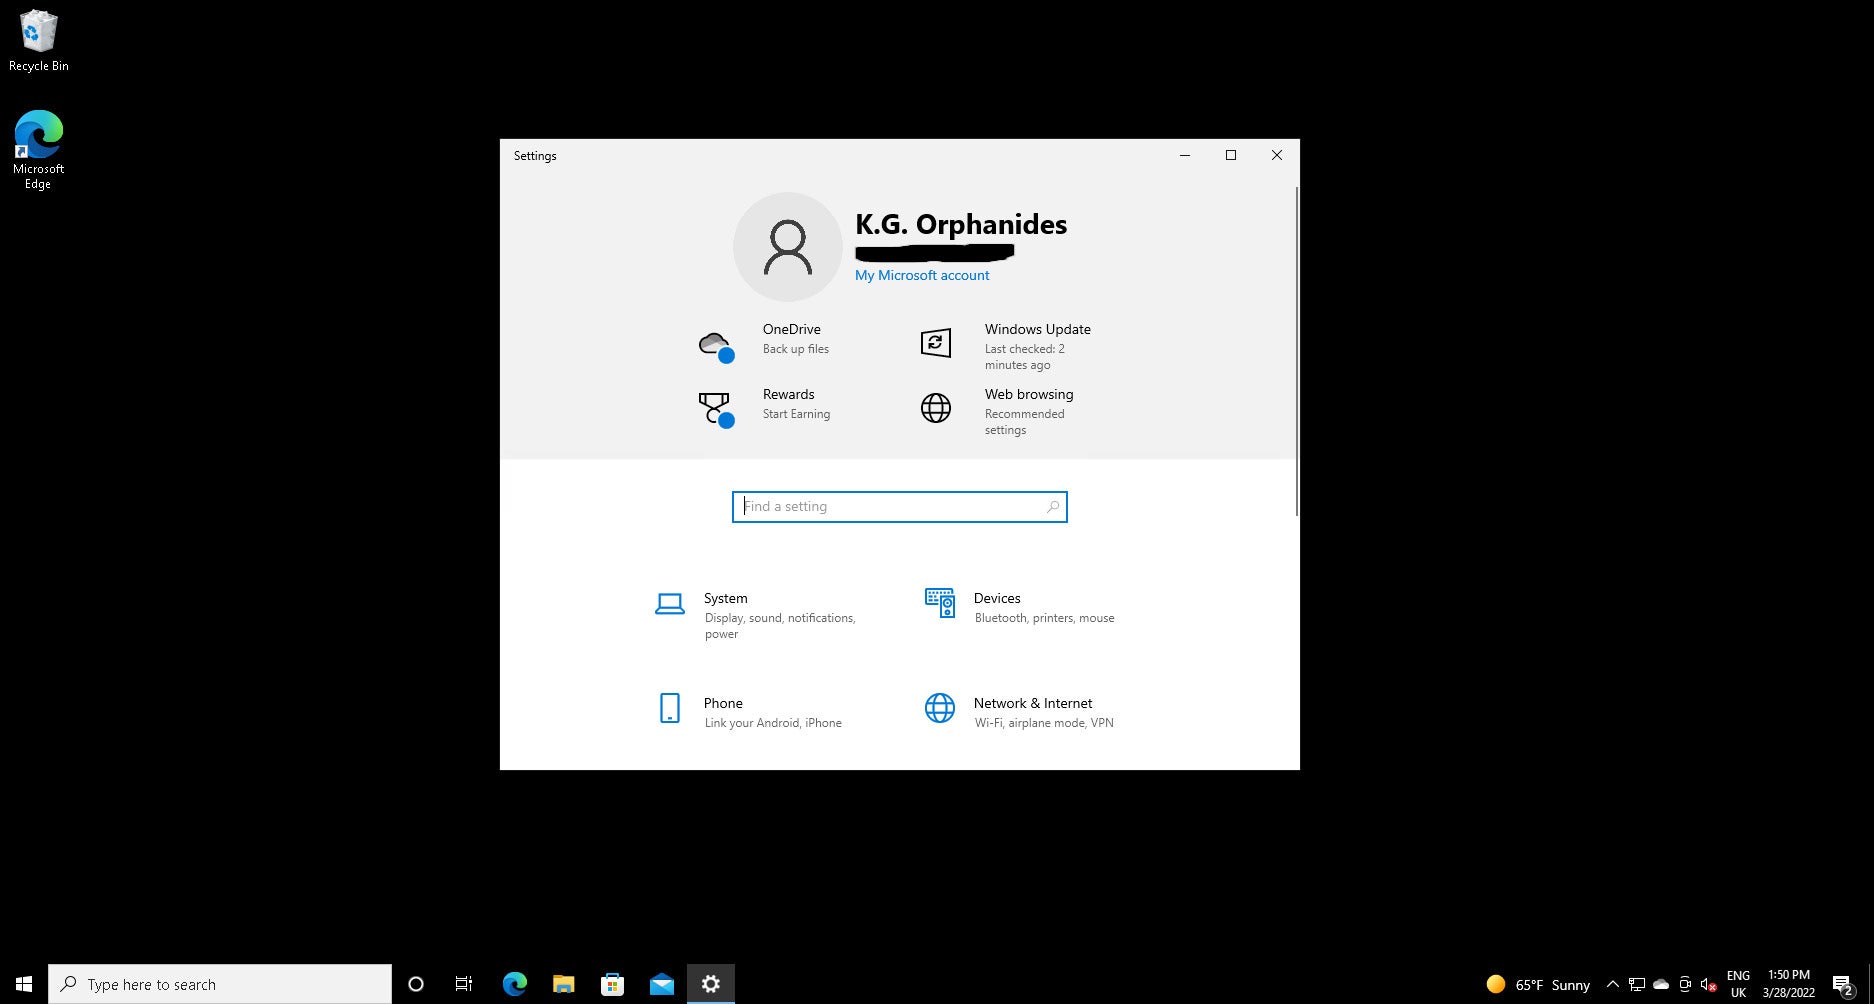
There are a lot of settings here. Scroll right to the bottom to find the option we’re looking for.
-
Step
5Click Update & Security
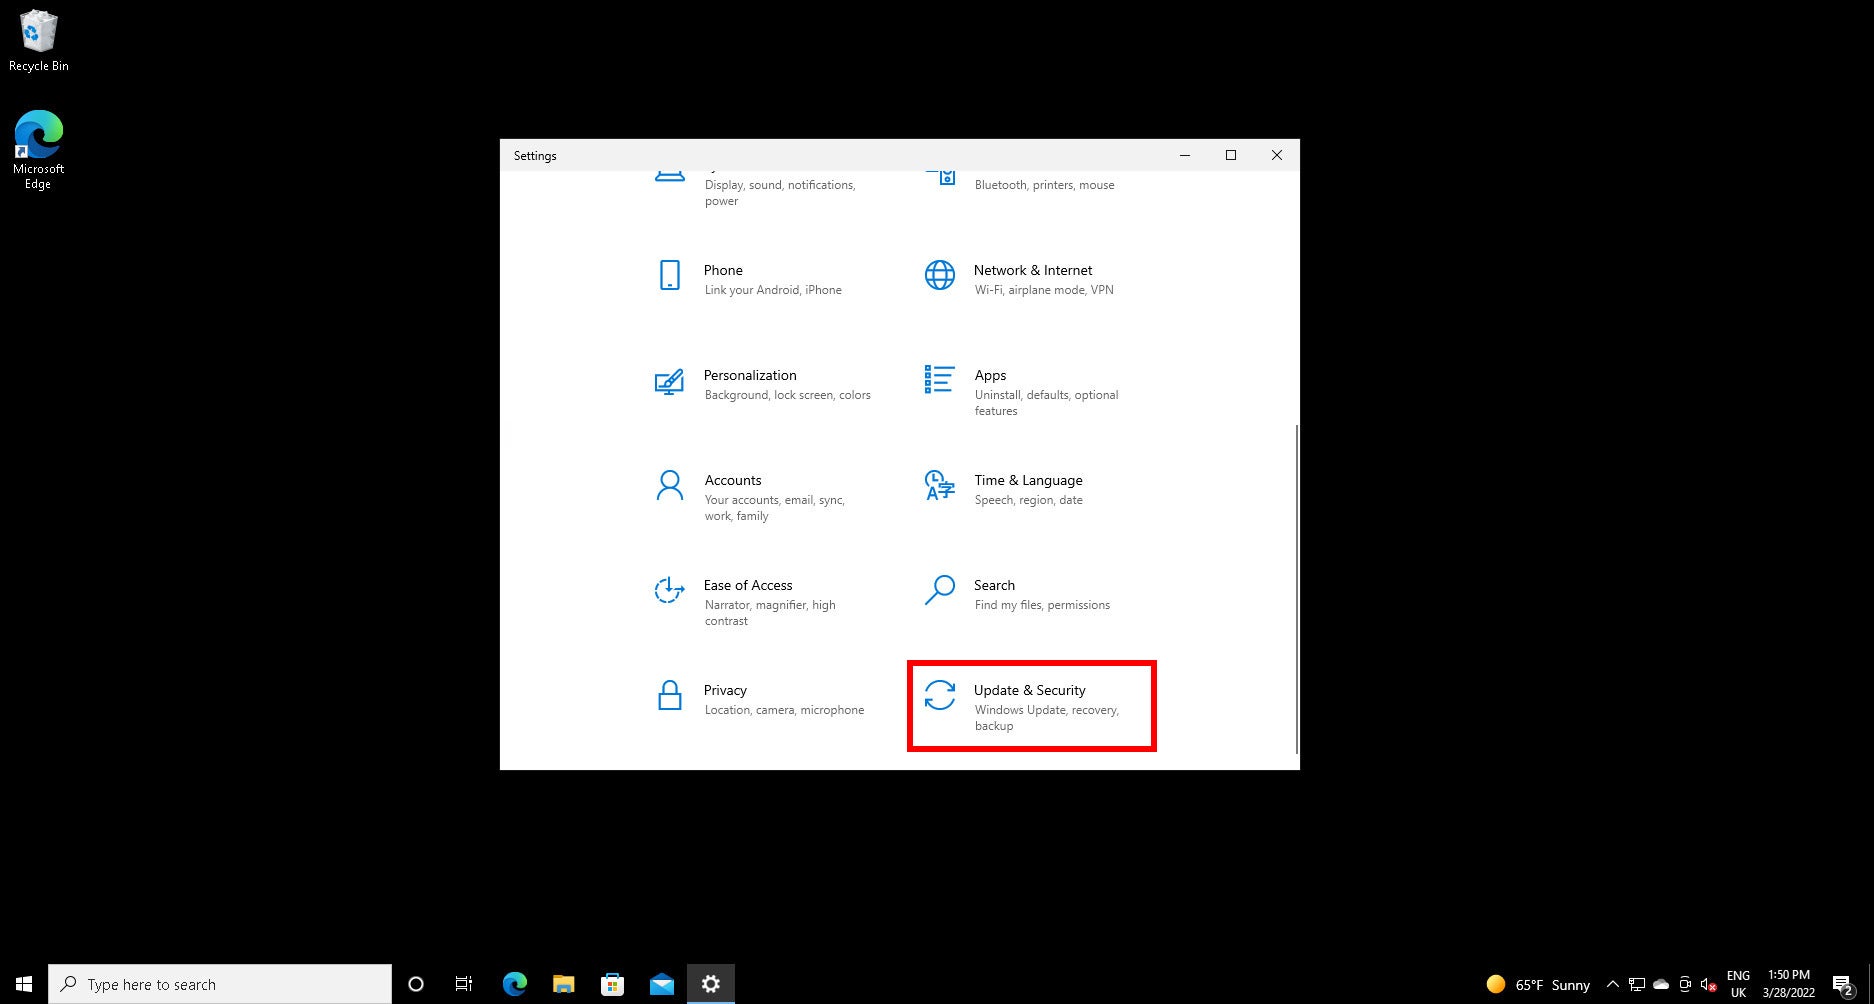
Click on the button marked “Update & Security”
-
Step
6Click the Windows Security tab

On the next Settings screen, you’ll see a tab bar on the left. Click Windows Security here.
-
Step
7Click Open Windows Security
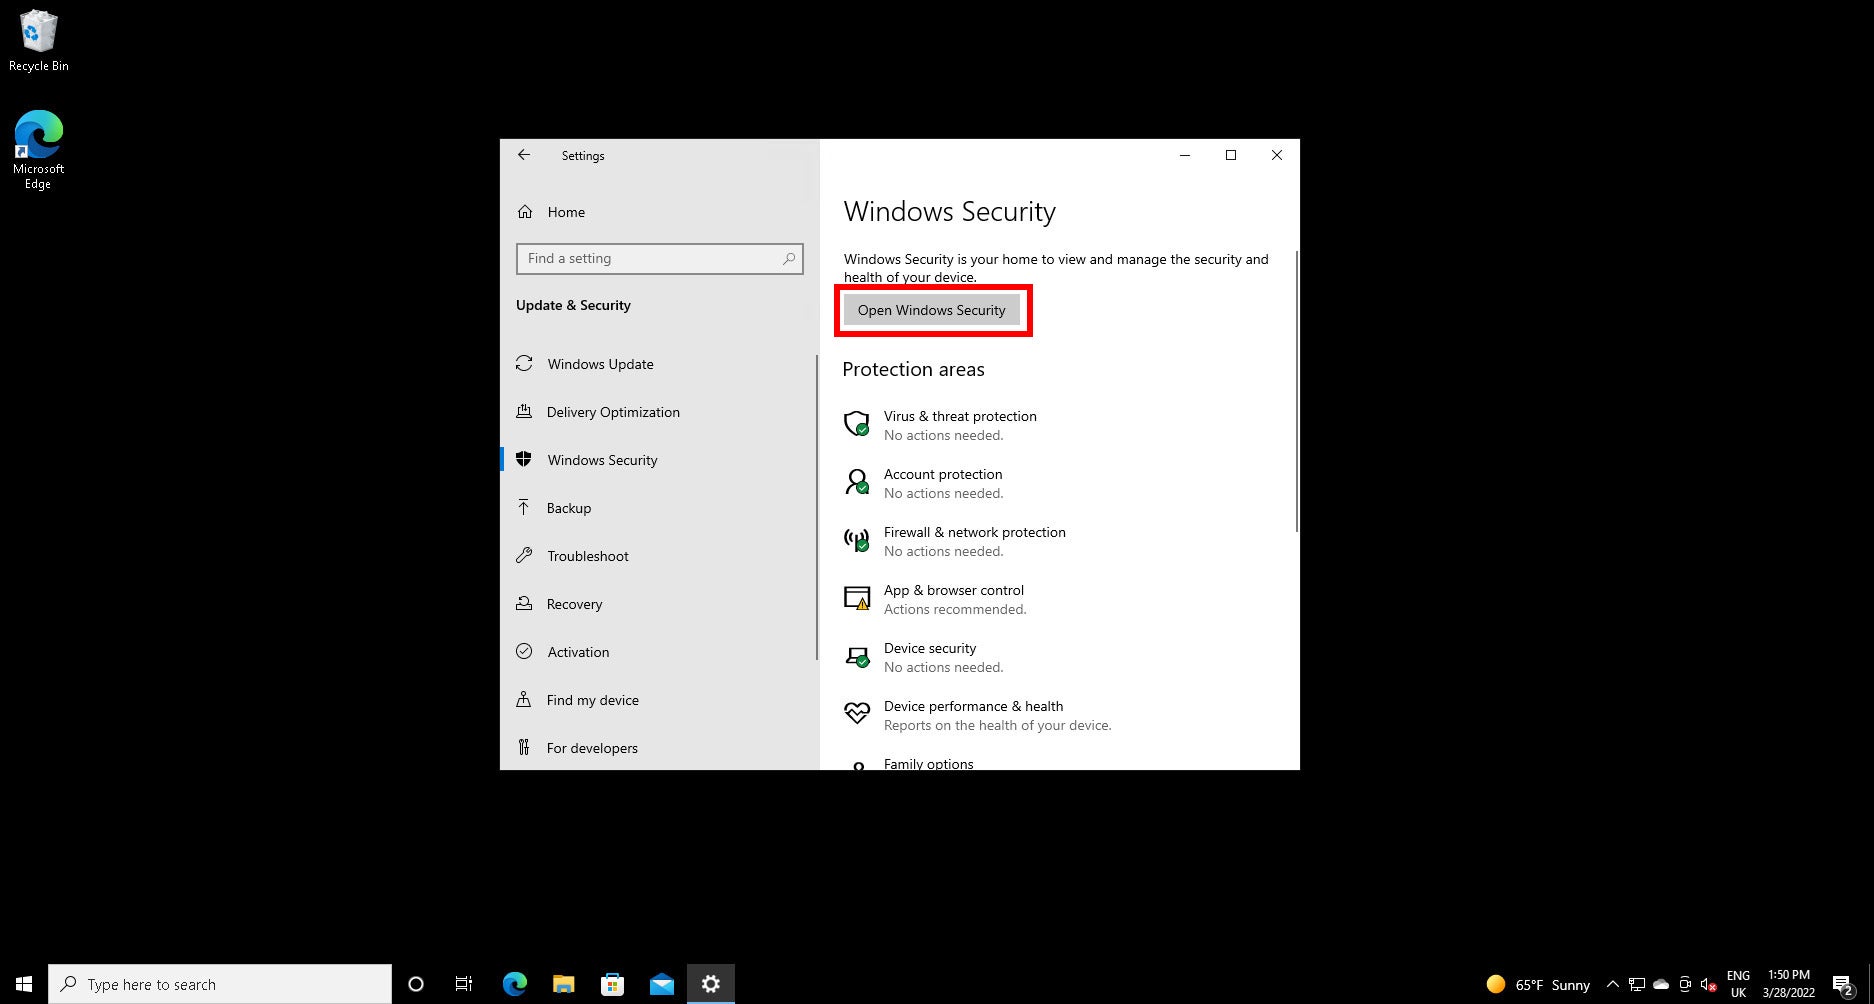
You can go directly to each component of Defender’s security settings from here, but we’ll go to the main menu first. Click the Open Windows Security button.
-
Step
8Click Virus & threat protection

Click the Virus & threat protection option.
-
Step
9Click Manage settings under Virus & threat protection settings

Under “Virus & threat protection settings”, you’ll see a small blue link marked Manage settings. Click on it.
-
Step
10Turn off the Real-time protection button
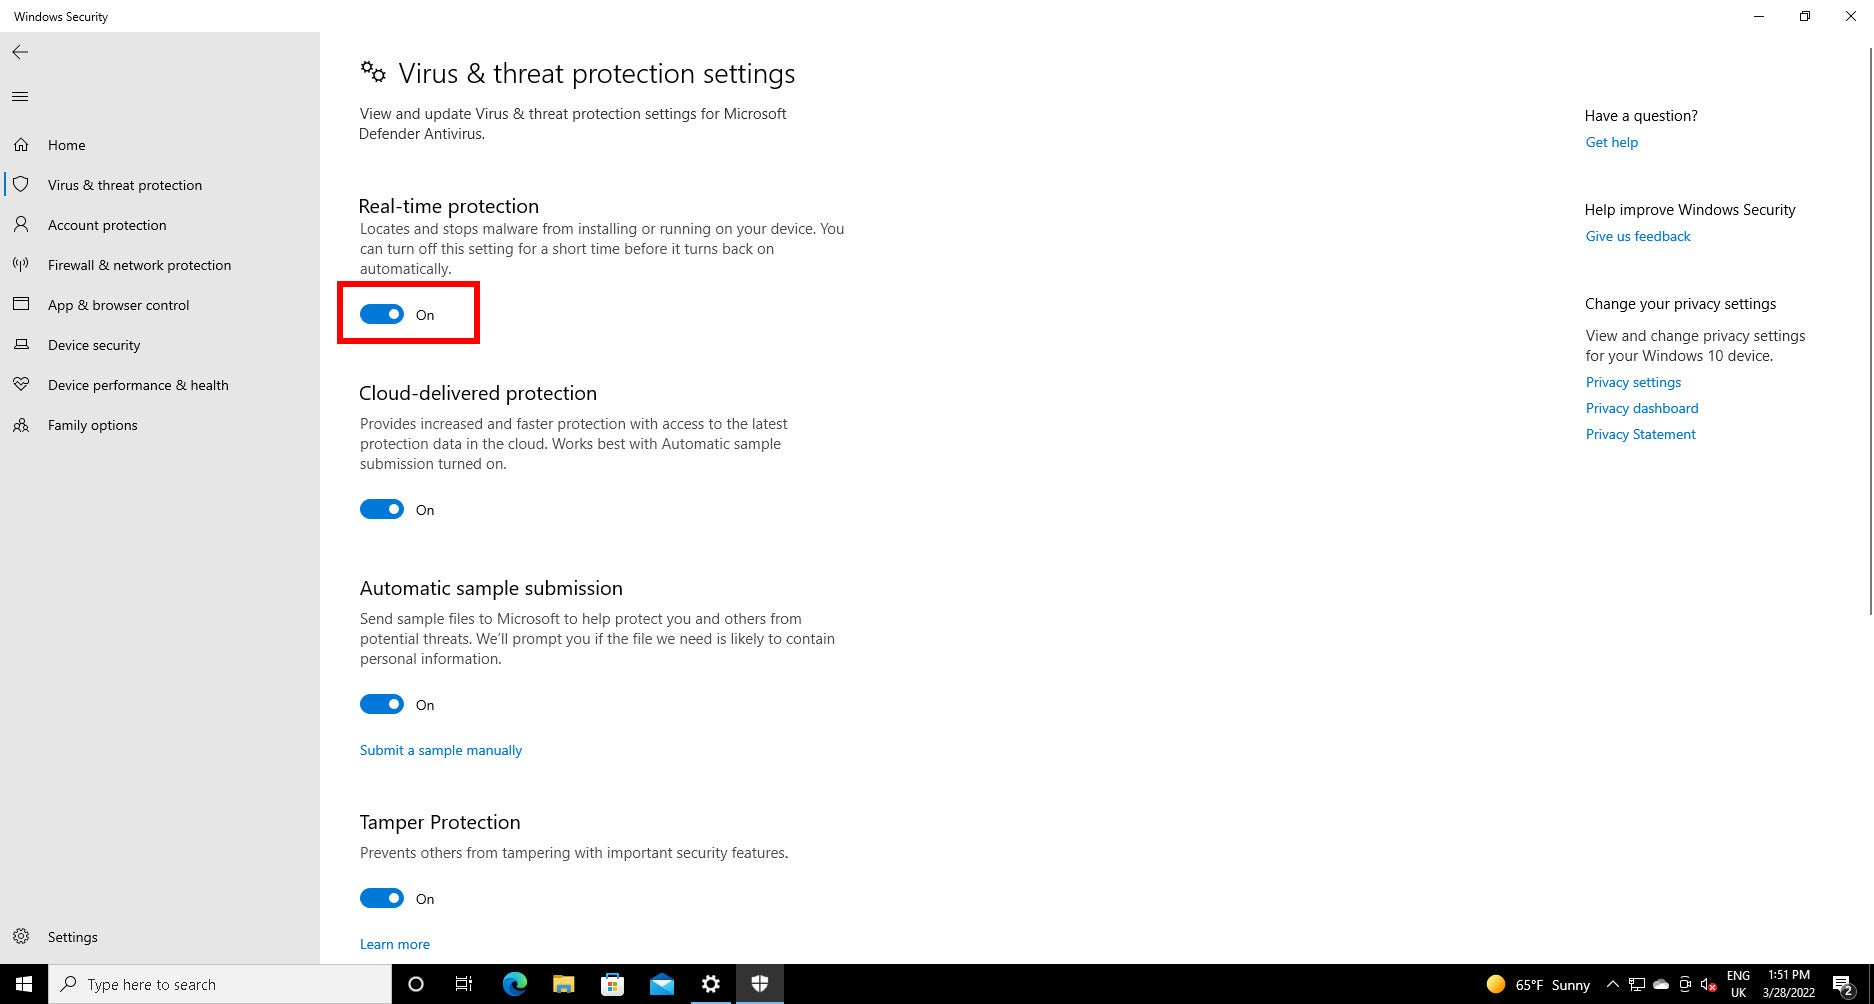
Under “Real-time protection” click the button, which should be coloured blue and set to “On” before you click it.
-
Step
11Click Yes

User Account Control will now chip in to make sure it was really you that requested this. Click Yes.
Real-time protection will be automatically re-activated on your next reboot. While the software informs you that Real-time protection will be re-enabled after a short time, Microsoft doesn’t, at time of writing, publish details of exactly how long this is, so remember manually re-enable Real-time protection if you don’t reboot.
Kaspersky Anti-Virus
Essential Virus Protection
Our 5-star rated anti-virus blocks malware and viruses in real time and stops hackers, now 50% off at just £12.49
- Kaspersky
- Was £24.99
- £12.49 per year
Troubleshooting
No. While scheduled scans will still run, newly downloaded and installed files will not be scanned until Defender is re-activated. Do so as soon as possible.
While you can’t uninstall Defender, if you install a third-party antivirus suite with real-time protection, Defender will be disabled in favour of your new antivirus solution.
Almost certainly not. Microsoft Defender has a very low false positive rate, so it’s likely that the program is a threat. If you’re convinced that the program is legitimate, check it at VirusTotal for a second opinion.


